Deploying Pelican (Static Blog) on Digital Ocean
Posted on Sat 02 January 2021 in Misc Tech • 6 min read
Well, it's 2021 and about a decade late, I've finally decided to get myself a blog.
I've toyed around with creating one several times previously, but things (i.e. work) gets in the way, and I end up losing the motivation to follow through with it in relatively short order, however the beginning of 2021 also coincides with what I think is a relatively interesting side-project that I'm going to be starting again, and I'd like to have some place to write about that.
Rather than hosting something on Medium or elsewhere, I wanted to just go with some static site generator, and as I'm particularly fond of nearly everything in Python-world, I've decided to use Pelican (rather than any number of good, and popular, options like Jekyll).
Furthermore, I'm lazy, so when I'm doing things for myself, I have a strong preference for deploying them on Digital Ocean, which I've found to be a wonderfully-simple option for deploying simple apps over the past few years. Unfortunately, for the longest time DO's Spaces have lacked the ability to run static sites in the same way you can do on S3, however they've recently remedied this with their new Apps Platform (just launched in Dec '20), which (also wonderfully enough) is free to use for basic static sites. Win.
The remainder of this article is just going to cover the basics of getting a blog scaffolded and deployed with Pelican on DO's new Apps Platform.
The Plan
- Pelican the Blogging Engine
- Github for Source Code Repo
- Digital Ocean Apps Platform for hosting
Bootstrapping Pelican
I'm going to assume you've got python setup on your local machine, so I'm going to skip over that, however if you don't you can get it from python.org/downloads .
Markdown vs Restructuredtext
Restructured text is an OK markup language, but suffers from a few things, mostly that it's very python specific. Just about everyone that works in anything tech related has some degree of experience with Markdown, so in most cases that would be my preferred markup language to use, if it were not for it's usage in Pelican. You can read about writing content for Pelican using Markdown here, but I personally find the metadata syntax a bit verbose, although you have to do much the same in RestructuredText, I think it's a bit easier on the eye in and doesn't require some non-standard syntax at the beginning of the post.
Article as Markdown
Title: Some Blog Post
Date: 2021-01-02
Category: Stuff
Tags: foo, bar

Lorem ipsum

## Sub Title
Dolar sed
The same in RestructuredText
Some Blog Post
==============

:date: 2021-01-02
:tags: foo, bar
:category: Stuff

Lorem ipsum

Sub Title
---------
Dolar sed
Creating the Project
# setup and activate our venv
mkdir my-blog
cd my-blog
python -m venv .venv
source .venv/bin/activate

# install Pelican w/ Markdown support (in case we ever do want to publish with it)
pip install 'Pelican[Markdown]' typogrify

# save to our requirements file
# don't be one of those bad people that saves all of pip freezes output to requirements
pip freeze | grep -E 'pelican|typogrify' > requirements.txt

# create our blog
pelican-quickstart
From here, you can fill out the answers as you see fit. Most of the defaults are probably OK, and they can all be easily changed later.
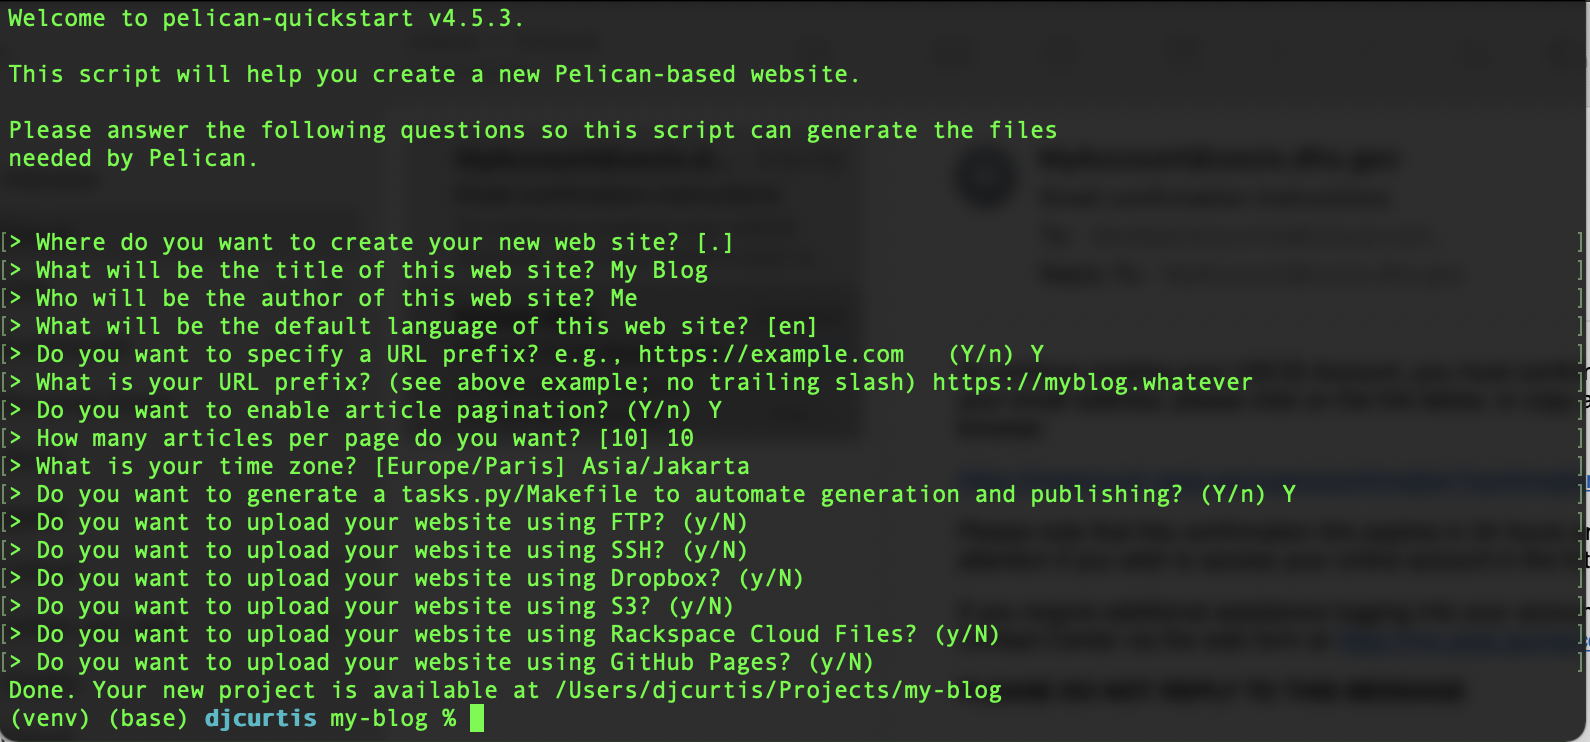
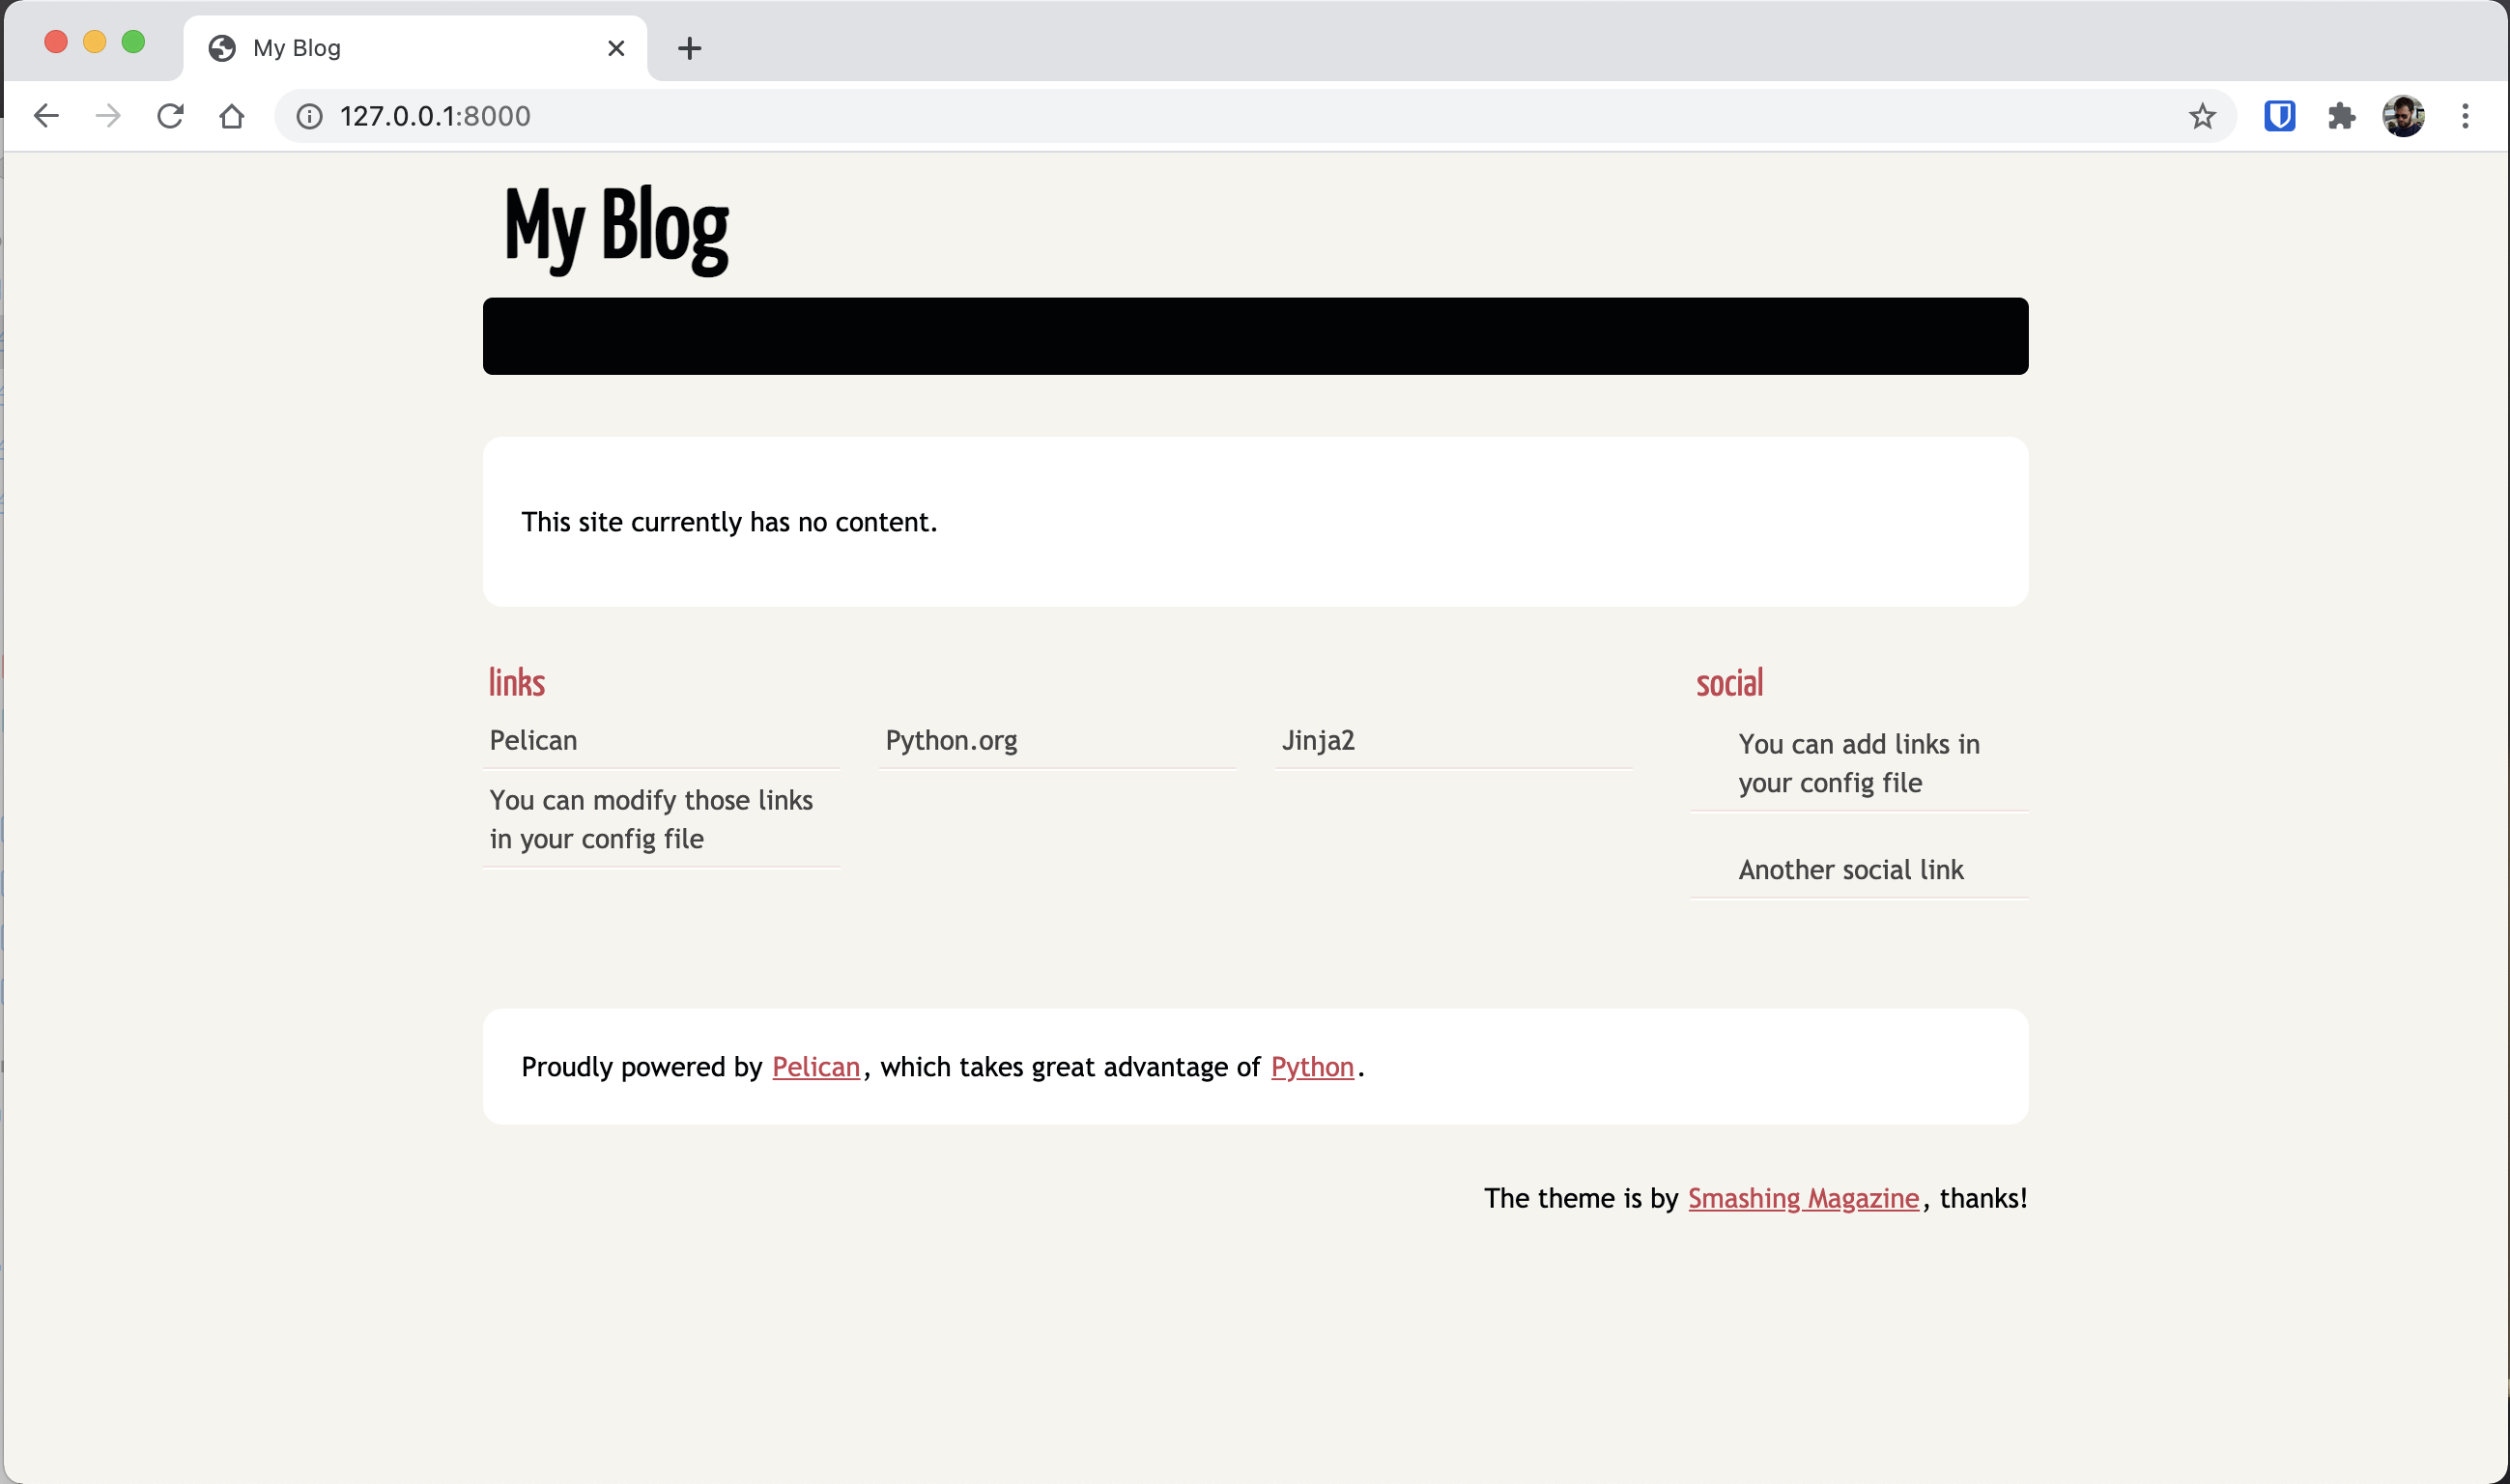
Now, if everything's gone well, you can run the following, and your site will be running locally on port 8000.
make devserver
Themes
This is one area I think could really be improved.
- The default theme that ships with Pelican is not responsive (and looks quite dated).
- There is no official themes repository maintained by the project. You can preview the themes on pelicanthemes.com which is painful.. but that's just about your best option.
- The installation process is silly, even with the pelican-themes command.
You'll probably want to follow the instructions and just get all of the themes from the pelican-themes repository stored locally.
Run the following from your blog directory and all will be good
# get all the themes on your local in their current version
git clone --recursive https://github.com/getpelican/pelican-themes ~/pelican-themes

# install a theme
pelican-themes -i ~/pelican-themes/Flex
Then you'll want to edit you pelicanconf.py file with the theme you're using
# pelicanconf.py
THEME = 'Flex'
I'd recommend taking this approach so you can easily try out several themes quickly until you find something you're happy with. Many of the themes are pretty low quality meaning IMHO they're just ugly or they don't properly support responsiveness.
Later if you're looking at new themes, you can also easily update all the tracked themes to their latest versions here:
cd ~/pelican-themes
git pull --recurse-submodules
I've decided to use the Flex theme for this blog, because it (a) looks reasonably pretty (b) is still getting updates (c) is actually responsive
Initializing Git
In the following steps, we'll be adding a git submodule for our desired theme, so we need to take the time to initialize git. We'll worry about getting the repo on Github later.
git init
cat >.gitignore <<EOL
.venv/
output/
__pycache__/
EOL
Getting the Theme Ready to Deploy
Because we're going to be deploying via a an automated build and deploy pipeline (we'll go into this later), we need to make sure that our chosen theme is easily available with our source code.
git submodule add https://github.com/alexandrevicenzi/Flex.git themes/Flex
You don't need to change the 'installed' flex theme from the version installed in our repository, but it's probably quite a good idea.
Plugins
IMHO, using 'plugins' is even worse than the themes situation. This should be SIMPLE and should involve just recommending the plugin authors to publish to PYPI and having a list of modules that should be loaded as plugins.
Unfortunately, this isn't the case with Pelican and they recommend actually copy-pasting source code to your local. This makes no sense in the Python ecosystem.
I'm not going to look any further at any plugins to use, as this is just supposed to be a short guide on using Pelican.
Getting the Code on Github
This is an exceptionally straight forward process, so I won't go into details here, as github already hand-holds you through the process if you're not familiar with it.
The important thing, for the next steps, is that the code is on GitHub not any other git repository hosting platform, as Digital Ocean's Apps Platform only supports (free) basic static site deployment from Github.
Deploying on Digital Ocean (Apps Platform)
In Dec 2020 (or thereabouts) Digital Ocean launched a new product called "Apps Platform". Although quite limited in it's capabilities (and making it unsuitable for use at my company), it's an AWESOME tool for deploying simple apps -- and nothing gets much simpler than a static site.
Best of all--it's free for static sites, automatically handles SSL and if you've got a custom domain, they'll basically handle that for you as well.
App Config Process
This is a very simple 4 step process that you'll be guided through.
Steps 1 and 2 are dead simple. Just authorize your Github account on Digital Ocean, and then select the repository. The name you select in step 2 is irrelevant -- pick whatever makes sense to you.
Step 3 is the only place where you need to configure anything.
Just make the following changed (highlighted in red).
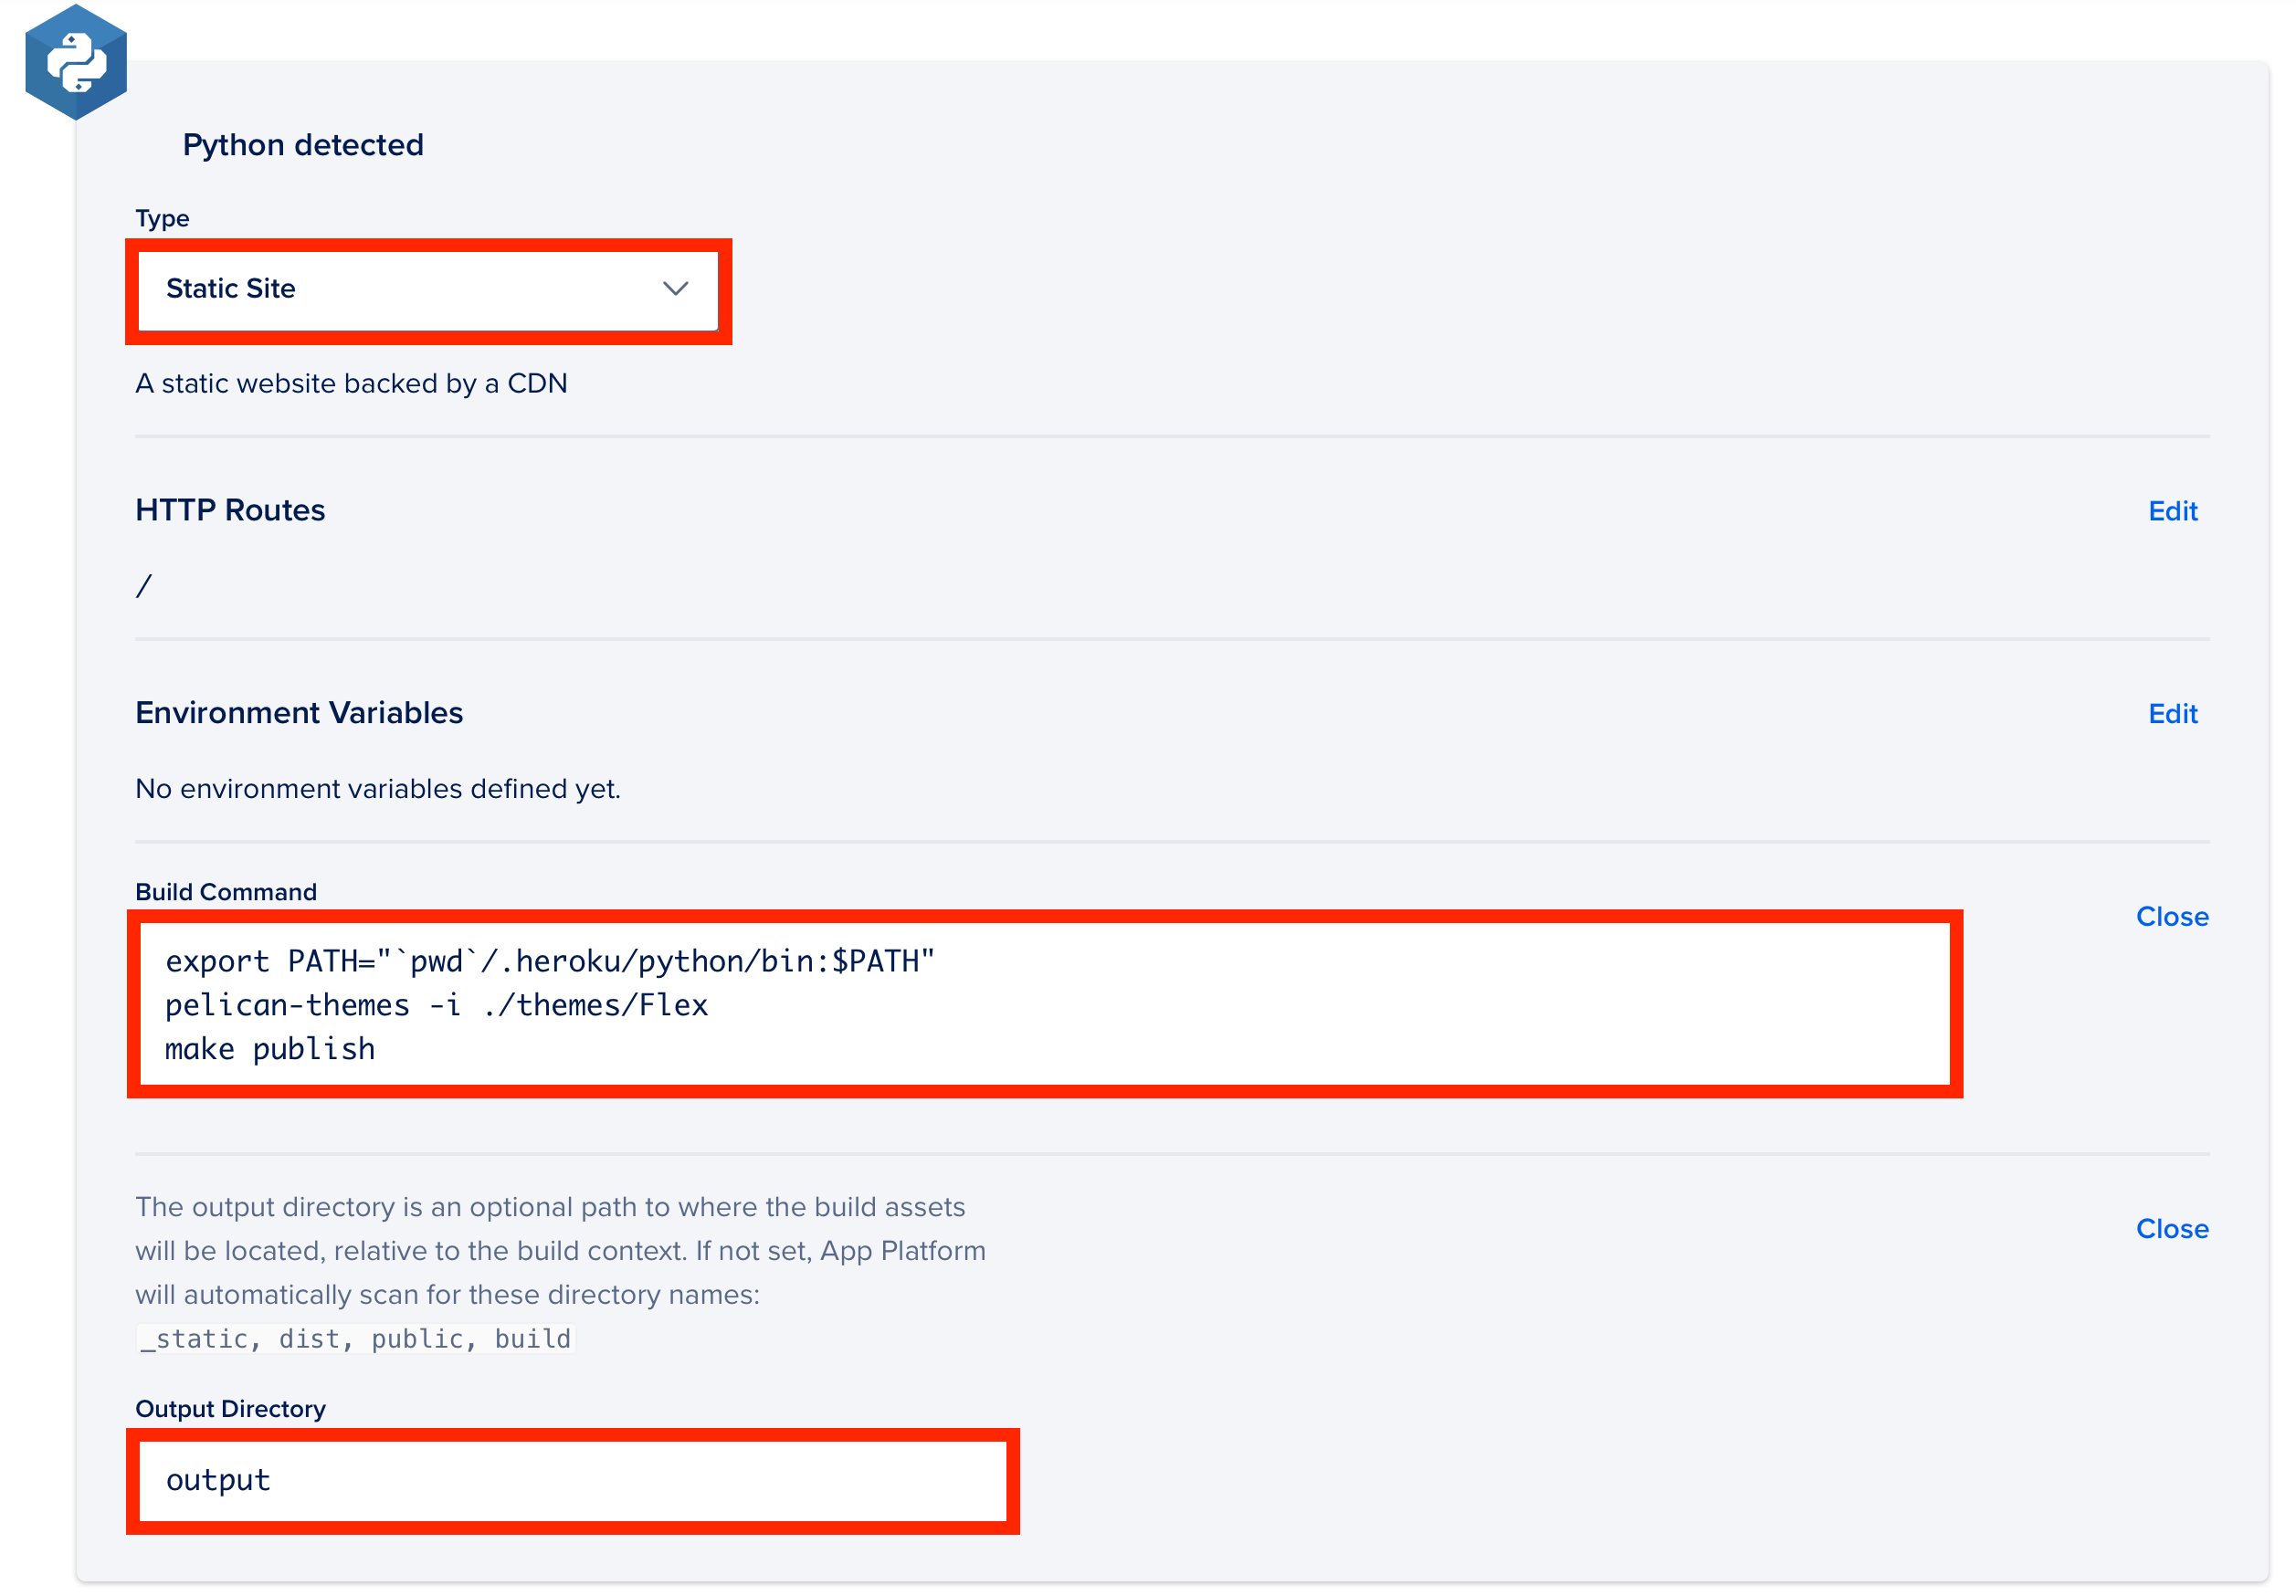
Unfortunately, and I'm not sure whether this is a bug DO will remedy, but when building a static site using Python, the PATH variable does not point to the correct Python instance (ie, the one that that builder installs whatever your requirements.txt file contains to), which caused me about a bit of frustration.
Build Command
export PATH="`pwd`/.heroku/python/bin:$PATH"
pelican-themes -i ./themes/Flex
make publish
Complete App Spec
This shouldn't be necessary, but just for reference.
domains:
- domain: blog.djcurtis.me
  type: PRIMARY
  zone: djcurtis.me
name: blog
region: nyc
static_sites:
- build_command: |-
    export PATH="`pwd`/.heroku/python/bin:$PATH"
    pelican-themes -i ./themes/Flex
    make publish
  environment_slug: python
  github:
    branch: master
    deploy_on_push: true
    repo: derekjamescurtis/blog
  name: blog
  output_dir: output
  routes:
  - path: /
Setting your Custom Domain
This was a wonderfully pain-free process as-well. Once your app has successfully built and deployed, you'll be provisioned a domain name automatically by digital ocean. Really not ideal for most folks, so assuming you have a domain name (and you can swap the name servers over to digital ocean), then you can specify a custom domain name from the config tab of your app.
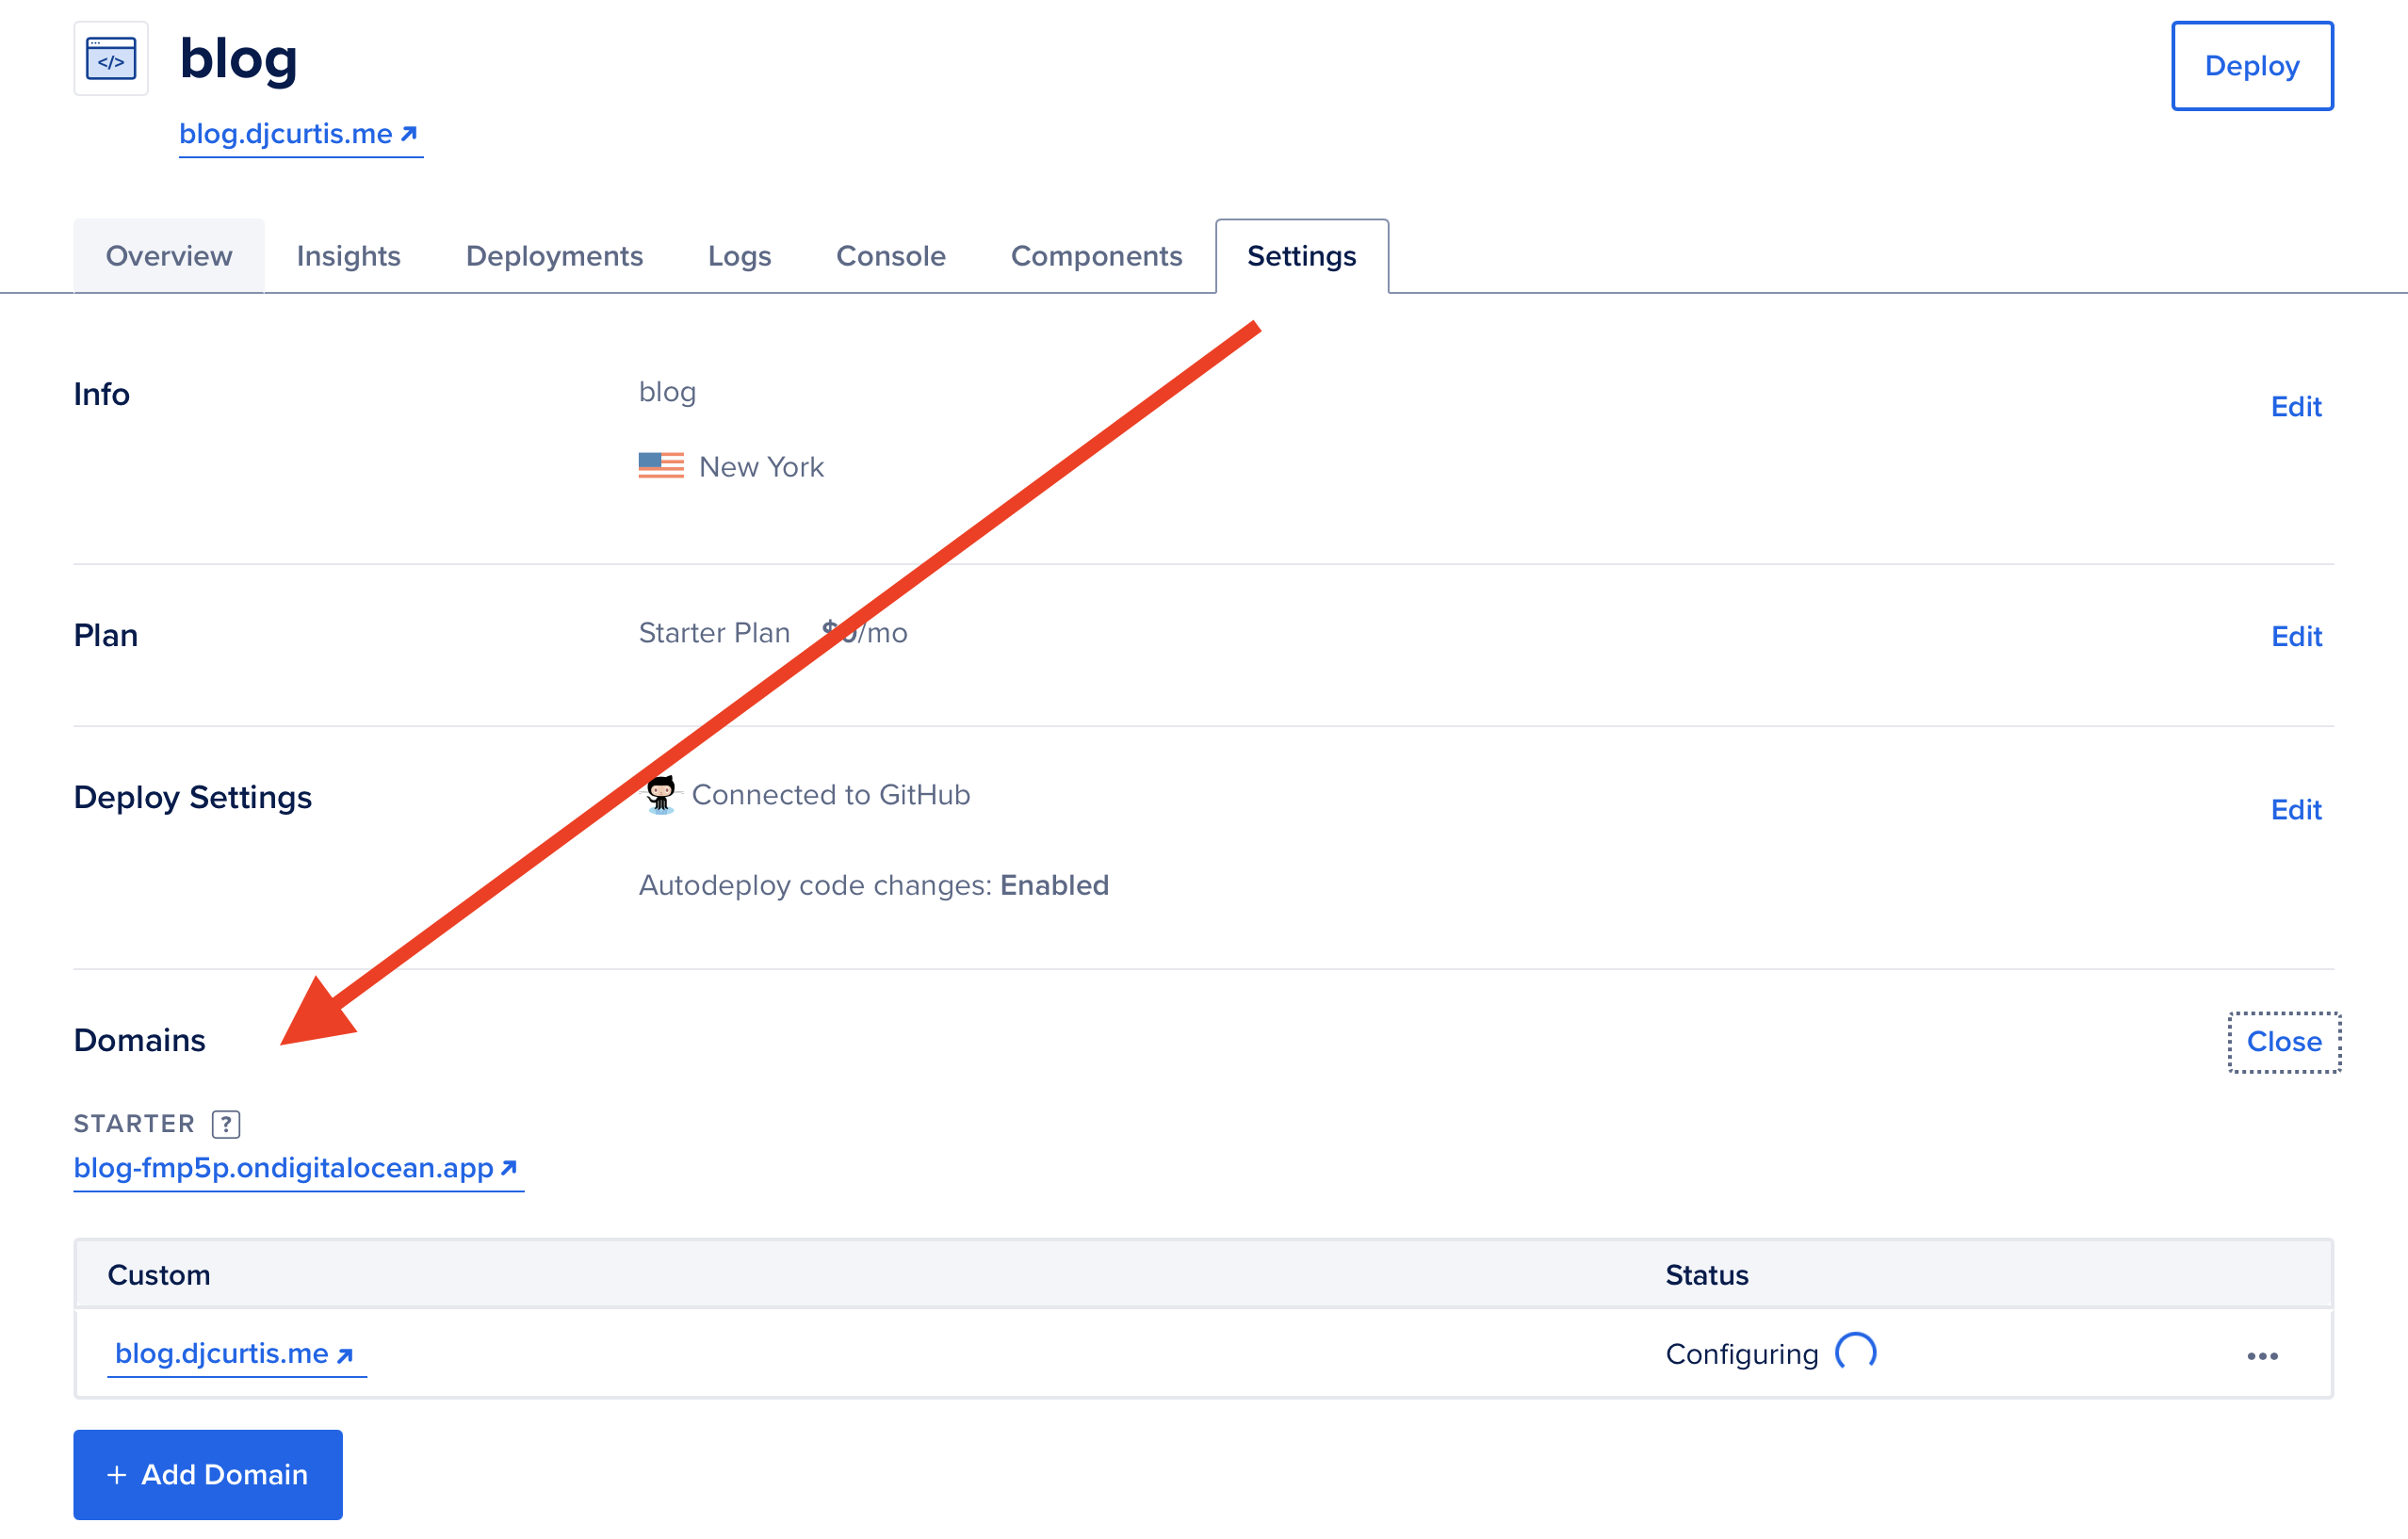
Just a final quick note here, you'll want to make sure whatever domain name you've configured is set properly in "publishconf.py"
# publishconf.py
SITEURL = 'https://blog.djcurtis.me'
RELATIVE_URLS = False
And that should be that! At this point, you should have a very simple blog setup and deployed. Any changes you commit to the master branch will automatically rebuild and redeploy your blog on Digital Ocean.
This article ended up being slightly longer than I expected, but following the instructions here should realistically be doable during a lunch break with plenty of time left-over to actually eat =P.
If you're struggling with any of the above-mentioned steps, you can always have a look at the code for this blog on Github.